ImageHost.orgImageHost.orgImageHost.orgImageHost.orgImageHost.org

Friday, April 8, 2011

Paper Tweets

First off I have to tell you guys how excited i am that...

Kori is moving on to week 2 on One Month To Win It!

She made a fun mirror out of Jenga blocks and its adorable. I am so proud of her!!!

Well next i have a new quick and easy project i made and i love it already. With my husband and I working off schedules we only get to see each other a lil bit in between work and during lunch. We only get to tell each other quick stories about our days and then we get to enjoy the weekend where we have so much to tell each other we forget a lot of stuff that's happened throughout the week. Well i had a notebook i saved all of Isaac's new words he has been saying and our personal blog helps him see what we do during the week but we still forget things. I even write on the bathroom mirrors with a dry erase but there are still some things i cant remember.
As i was looking for a gift for my nephews birthday i came across the cutest thing. Paper Tweets! I don't have a twitter account but the idea was so cute and a perfect way to share what goes on while each of us are gone.

DSC_1651 fixed

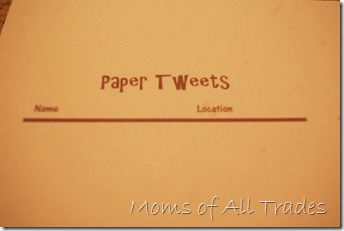
If you haven't entered our drawing you really should. I have the digital studio software and i use it all the time. I don't scrapbook much but i use it for everything else. Anyways i threw this together really quickly using that software since they have some of the cutest fonts. I made this up pretty quickly cause i had so much to write down. My son was being a goof and i wanted to write them all down asap. I made each "tweet sheet" half a page since most of the notes we leave around the house are that size.
DSC_1644 fixed DSC_1647 fixed   
I wrote name and location and at the bottom i added the time and day. I like to know the day i even write the day on any picture my son draws so he can know when he did them. Anyways on to the cover

DSC_1649
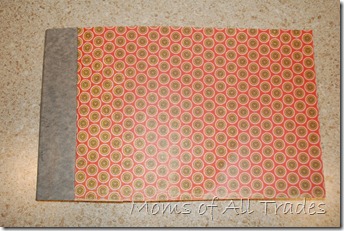
I used some plain gray card stock for the back and overlapped in the front and then added some cute scrapbook paper to the front. it was all scraps so i didn't waste any paper.
DSC_1652
I need to write something on the front but I'm stumped on what it should say. Any suggestions?


DSC_1660 fixed
My son found some cookies I had saved for my husband and insisted on having one. He looked at me with those big blue eyes and i couldn't resist.

I had this sitting on my counter and when my husband got home I heard him laughing in the other room as he read it. It made my whole day!

I think I might make a tiny one that I can throw in my back pocket for while I'm on the go. How would you change it? I would love to hear your ideas!



P.S. Thanks for all the ideas on the grocery cards. I have the cards done now I just need to print them out!

Thursday, April 7, 2011

Sweater 2 Shrug

My friends little girl was competing in a local Little Miss pageant recently. Well the dress code was church attire and she found her the cutest dress but not exactly church attire.So we headed to the thrift store in hopes to find a shrug or a shirt that would work under the dress. We didn't find them but we did find this beauty for $1.00DSC_0759
We knew for $1.00 we could make something work. I started by having her try it on and marked the length that we wanted. Keep in mind the hem, and cut off the bottom. Next fold your sweater in half and mark the middle of the front where you will want to cut it.DSC_0760I grabbed a washable marker to draw my line where I would round the edges. Then once that piece is cut off flip it onto the other side and mark it and cut. DSC_0761All that is left is to press and sew! Super easy and quick! What do you think?DSC_0767What do you think of the side by side? Left Not perfect for and 8 year old right Perfect for a Little Miss Princess!                                 DSC_0770DSC_0774  This was so easy and the sweater will look cute over any t-shirt too!
~Kori

Monday, April 4, 2011

Rock Shoe Mat

As we were building our house i was looking on the internet for ideas on how to decorate it. I came across a shoe mat where they used these tiny rocks. Where my husband comes home with dirty and muddy shoes on a regular basis i wanted to make something like that but it a little more durable by using bigger rocks. Wanna see how i made this?

DSC_1630 DSC_1611

When i saw the mat with the small rocks they used a bought plastic shoe mat and i thought i have tons of left over wood from our house so I grabbed a scrap piece of wood that i saved and for the rest of the supplies i bought 5 bags of rocks at the dollar store and some silicone from the hardware store.

 DSC_1627

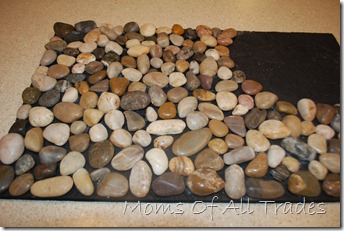
I painted and then arranged the rocks on the plywood. 

DSC_1624

Then i started gluing on the rocks. I used a clear silicone sealant but you can use anything you have around the house. I thought about using my glue gun but it has disappeared during the move.

DSC_1626

I started gluing each rock then i went the easy way out and put glue all over the board. Both ways worked good and where i used the silicone sealant it stayed soft and i was able to move the rocks around if i didnt like they way it looked. The more random the rocks the better it looks.

DSC_1628

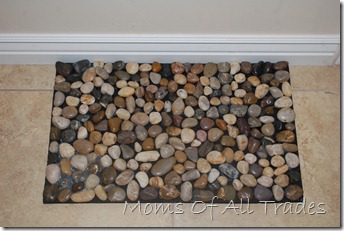
I had some left over silicone so i filled in some of the spaces on the one corner to see which way my husband would like better. If he likes it i will do the rest if not i will just pull it off and add new rocks.

DSC_1630

I love it! I love it even more that i used a free piece of plywood, $5.00 worth of river rocks and a $5.00 silicone tube and was able to make a $10.00 mat that is cute, durable and a perfect addition to my bare house. So what do you think of my rock shoe mat?

-Tara

Voting Time

Hey everyone today is the first day of
and we are competing. Can you guess which we submitted? Hopefully we make it to round 2
   Go vote today ONE MONTH TO WIN IT

Friday, April 1, 2011

Rice Crafting

DSC_1221Have you ever died rice before? think back to your Preschool./kindergarten days. Well I got to thinking the other day how much green rice looks like grass and would make a fun kid project. Of course my little one is still a little on the young side and was set on trying to eat the green rice! Simply start by pouring some plain rice into a zip lock bag and add the color of your choice. I added about 30 drops for my green rice.DSC_1074Mix around the rice until it is the color consistency you like and then pour it out onto a cookie sheet. Let your rice dry for about a day and then you can let your creativity roam free.DSC_1081
Ok for my original idea I had these great tree planned and I would add jelly beans to them and they would simply look amazing… Reality not so much! DSC_1213So I searched  the house and this is what I came up with a shoebox lid, a straw and a pot! DSC_1218Remembering these adorable topiaries I had seen at Rook No. 17, Jenn made these adorable Bunny Topiaries and so I thought I would give it a try with my rice. I simply drew a bunny shape on my lid and cut it out, DSC_1219then added glue and rice.  I covered my straw with some green ribbon and added some yummy  chocolate Easter eggs to my jar. What do you think?DSC_1221
What would you create with a bag of colorful green rice? I still have a bunch so I need some ideas ;)
~Kori

Visit thecsiproject.com
Related Posts Plugin for WordPress, Blogger...